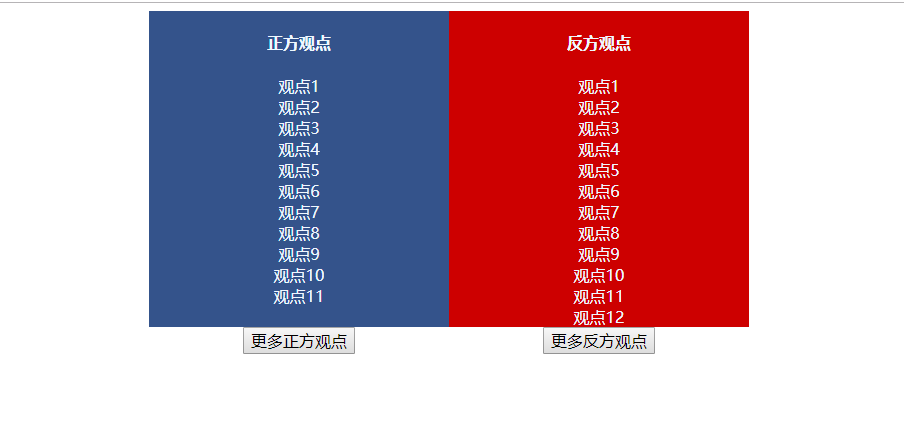
此布局多出现在分栏有背景色或者中间有分割线的布局中,有可能左边内容多,有可能右边内容多。但无论内容多少,两栏背景色都和容器一样高;
margin-bottom: -9999px;
padding-bottom: 9999px;
解释: 垂直方向的 margin 无法改变元素的内部尺寸,但却能改变外部尺寸,这里我们设置margin-bottom:-9999px意味着元素的外部尺寸在垂直方向上小了9999px。默认情况下,垂直方向元素上下距离都是0,这种情况下,也即后面元素向上移动了9999px。此时,通过 padding-bottom: 9999px;,增加元素高度,正负抵消,对布局层没得影响,但是却使得视觉层多了9999px高度可用的背景色。再配合父元素的 overflow:hidden,实现了视觉上的等高布局效果。
效果:
代码:
<div class="column-box">
        <div id="colLeft" class="column-left">
            <h4>正方观点</h4>
            <p>观点1</p>
        </div>
        <div id="colRight" class="column-right">
            <h4>反方观点</h4>
            <p>观点1</p>
        </div>
    </div>

    <div class="column-box">
           <div class="half">
                <input type="button"  id="leftMore" value="更多正方观点">
           </div>
           <div class="half">
                <input type="button"  id="rightMore" value="更多反方观点">
           </div>
        </div>
    <style>
        .column-box{
            overflow: hidden;
            margin: auto;
            max-width: 600px;
            text-align: center;
        }
        .column-left,
        .column-right{

            margin-bottom: -9999px;
            padding-bottom: 9999px;
            float: left;
            width: 50%;
            color: aliceblue
        }
        .column-left{
            background-color: #34538b;
        }
        .column-right{
            background-color: #cd0000;
        }
        button,input{
            font-size: 1em;
            font-family: inherit;
        }
        p{
            margin:0;
        }
        .half{
            float: left;
            width: 50%;
        }
    </style>

    <script>
        let $ = function(id){
            return document.getElementById(id);
        }

        let colLeft = $('colLeft'),colRight = $('colRight');

        let leftMore = $('leftMore'),rightMore = $('rightMore');

        let indexLeft = 1,indexRight = 1;

        if(colLeft && colRight && leftMore && rightMore){
            leftMore.onclick = function(){
                indexLeft++;
                colLeft.insertAdjacentHTML('beforeend','<p>观点'+indexLeft+'</p>');
            };
            rightMore.onclick = function(){
                indexRight++;
                colRight.insertAdjacentHTML('beforeend','<p>观点'+indexRight+'</p>');
            };
        }
    </script>
insertAdjacentHTML
MDN 上这样介绍->链接:
将指定的文本解析为HTML或XML,并将结果节点插入到DOM树中的指定位置。它不会重新解析它正在使用的元素,因此它不会破坏元素内的现有元素。这避免了额外的序列化步骤,使其比直接innerHTML操作更快。
element.insertAdjacenHTML(position, text)
position是相对于元素的位置,必须是以下字符串之一:
'beforebegin'元素自身的前面'afterbegin'插入元素内部的第一个子节点之前'beforeend'插入元素内部的最后一个子节点之后'afterend'元素自身的后面
text是要被解析成html或xml,并插入DOM树的字符串。
利用border实现等高布局:
左侧深色背景区域是由border-left属性生成,元素边框高度总是和元素自身高度保持一致,因此可以巧妙实现等高布局。

代码:
 <div class="box">
    <nav>
      <h3 class="nav">导航1</h3>
    </nav>
    <section>
        <div class="module">模块1</div>
    </section>
  </div>
  <div class="container">
    <div class="left">
      <input type="button" id="navMore" value="更多导航">
    </div>
    <div class="right">
        <input type="button" id="moduleMore" value="更多模块">
      </div>
  </div>
  <style>
    .box{
      line-height: 40px;
      border-left: 150px solid #333;
      background-color: #f0f3f9;
    }

    .box > nav{
      width: 150px;
      /* margin-left: -150px; */
      margin:0;
       margin-left: -150px;
      float: left;
      text-align: center;
      color: #f0f3f9;
    }
    h3{
      margin: 0;
    }
    .box > section{
      overflow:hidden;
      text-align: center;
    }
    /* 消除浮动 */
    .box::after{
      content: "";
      display: block;
      clear: both;
    }
    .container{
      margin: auto;
      padding: 10px 0;
      max-width: 600px;
      overflow: hidden;
    }
    .left{
      width: 150px;
      float: left;
      text-align: center;
    }
    .right{
      display: table-cell;
      width: 600px;
      text-align: center;
    }
  </style>
  <script>
    let navMore = document.getElementById('navMore'),
        moduleMore = document.getElementById('moduleMore');

    if(navMore && moduleMore){
      let nav = document.querySelector('nav'),
          section = document.querySelector('section');
      let navIndex = 1,  sectionIndex = 1;
      let rand = function(){
        //输出样例 'f6'
        return (Math.random()> 0.5 ? 'f' : 'e') + (Math.random()+'').slice(-1);
      };
      navMore.onclick = function(){
        navIndex++;
        nav.insertAdjacentHTML('beforeEnd','<h3 class="nav">导航'+navIndex+'</h3>');
      }
      moduleMore.onclick = function(){
        sectionIndex++;
        // 生成随机颜色
        section.insertAdjacentHTML('beforeEnd','<div class="module" style="background:#'
          +[rand(),rand(),rand()].join('')+'">模块'+sectionIndex+'</div>');
      };
    }
  </script>